Style 5 is in a league of its own. No stencil, no light shining through, no shades to follow. Just your tools, your imagination, and a pumpkin you’re going to turn into a sculpture. These carvings aren’t lit from the inside. Instead, they’re displayed under an outside light that casts shadows across the carved surface, bringing out all that depth and texture.
This style takes practice. Your first attempt may not be what you imagined, and that’s totally okay. Every carver who does this style gets better each year. The results are impressive when it comes together. I’m no expert at this style myself. I honestly haven’t given it enough attempts. But I have a huge admiration for the artists who bring these sculptures to life.

Choosing your pumpkin: You’ll want a large, tall, and fairly flat-fronted pumpkin. The rounder the pumpkin, the harder it is to carve a face that looks right. Don’t gut it. The firm walls give you more material to work with, and a full pumpkin also lasts much longer since there are no open cuts.
Plan before you carve: Lightly sketch your design on the pumpkin with a pencil or washable marker before committing to any cuts. Think about where the eyes, nose, and mouth will sit and how they’ll be spaced. Reference photos are a big help here.
Remove the skin first: Use a large ribbon clay tool to scrape away the orange skin from the area where the face will be.
Block in the big shapes: Think of the nose as the highest point of the face. It sticks out the most and gets carved the least. Everything around it gets carved deeper. Start by carving shallow cavities where the eyes will sit, and a slight recess where the mouth will go. Don’t go deep yet, just rough in the general positions.
Carve deeper into each feature: Work on one feature at a time. Eyes sit deep in their sockets. Cheeks are slightly raised. The brow ridge sticks out above the eyes. Use medium and small ribbon clay tools to shape each area, always removing small amounts at a time.
Critical rule: never break through the wall. If you accidentally carve through to the inside cavity, that area will rot very quickly and wreck your carving. Go slowly, especially around the eyes and nose. If you’re unsure how deep you are, stop and check.
Add details last: Once all the major features are shaped, go back and add fine lines, wrinkles, and texture with your smallest tools. Step back often and view from a distance. Details that look subtle up close will read strongly from a few feet away.
Shades: None. Depth and shadow do all the work.
Pros:
- Pumpkin lasts a long time. No open cuts to speed up rotting.
- Completely unique. No two sculpted pumpkins look the same.
Cons:
- No stencil to guide you. Takes practice to develop the technique.
- Mistakes can’t always be fixed once material is removed.
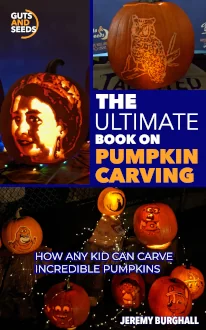
Free download
Get The Ultimate Book on Pumpkin Carving — free
64 chapters covering every technique, every tool, and all nine carving styles. Written by someone who has carved pumpkin portraits for over 30 years and taught 500+ kids. Illustrated with real carvings by the author and his students.
Get the free book →Free to download. Works on iPhone, iPad, Android, and computer.