
Before you start scraping the skin off, you need a shallow cut along all the scrape lines first. This gives you clean, thin boundary lines to scrape up to. Without it, I’ve found it’s really easy to accidentally remove skin outside the scraped areas and damage your design.
Gloves are strongly recommended for this step.
Start with a practice cut. Find the largest scraped area on your stencil, this is where you’ll practice. Using your V-shape wood carving tool, make a short shallow stroke across the area. You’re aiming for a line about 1/16” (1mm) wide, just deep enough to cut through the skin, no deeper. Get comfortable with how much pressure it takes before moving on. If you go too deep here it doesn’t matter much since this area will be fully scraped away later anyway.
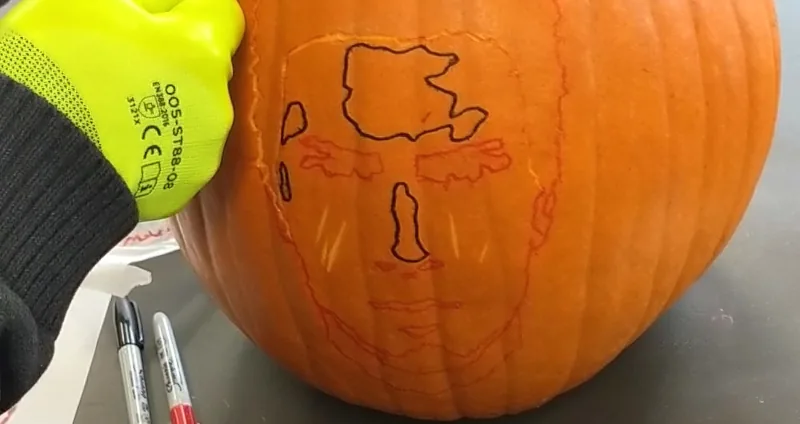
Once you’re comfortable, start tracing all the scrape lines on your stencil with the V-shape tool. These are the lines marking the boundary between areas that keep their skin and areas that will be scraped. Ignore the saw hole lines and any black Sharpie filled areas. Those are handled in other steps.
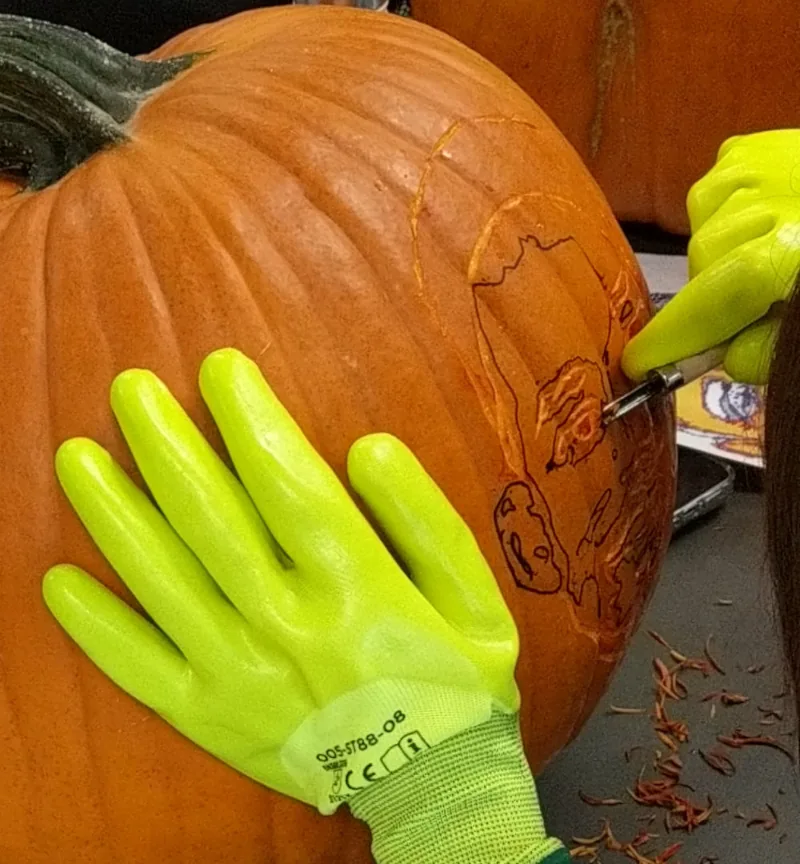
Identifying your scrape lines. Refer to your original printed stencil to confirm which lines are the scrape lines. In Pumpkin Studio they are the red lines. This is where having a clean second printed copy of your stencil really helps. You may also want to refer to the tissue or stencil paper that was attached to your pumpkin. This is especially helpful for lines near the corners where folds distorted the original lines and you had to connect them by hand.
- Sharpie Trace method: if you used different colored Sharpies when tracing onto the pumpkin, the scrape lines should be easy to identify. If different line types used the same color Sharpie, be careful not to confuse your scrape lines with any Black Sharpie Marking lines or Saw lines. Check against your printed stencil.
- Pushpin method: follow your dotted lines carefully, using your stencil to confirm which dots are scrape lines. Rub a little flour over the surface first to make the dots easier to see.
Keep your stencil close throughout this whole step. You’ll be checking it constantly.
The line only needs to be as deep as the skin. It’s just there to act as a natural stop when you’re scraping later, so you don’t accidentally go outside the boundary.
Remember, rotate or lay the pumpkin on its side to keep yourself in a comfortable position. Always carve away from your body.
Free download
Get The Ultimate Book on Pumpkin Carving — free
64 chapters covering every technique, every tool, and all nine carving styles. Written by someone who has carved pumpkin portraits for over 30 years and taught 500+ kids. Illustrated with real carvings by the author and his students.
Get the free book →Free to download. Works on iPhone, iPad, Android, and computer.