
Now that you have your scrape line boundaries cut and your saw hole boundaries sawed, it’s time to remove the skin from all the scraped areas on your stencil. You will want to double check your stencil here as you carve.
You want to avoid accidentally inverting the image, scraping the opposite wrong sections.
Gloves are strongly recommended for this step.
Start with a practice scrape. Just as you did in the previous chapter, practice in the largest scraped area. Using your U-shape wood carving tool, make a shallow stroke. You’re only removing the thin outer skin, not digging into the pumpkin underneath. The skin is only 1/16” (1–2 mm) thick. Get a feel for the right depth before moving on.
Widen the boundary first. Before scraping the middle of each area, use the U-shape tool to follow along the inside of the V-shape lines you cut in Chapter 44, carving inward into the scraped area. This creates a wider “moat” around the boundary. A clear safe zone that makes it much harder to accidentally stray outside the scraped area. The U-shape tool is also the right choice for any tight, narrow spaces where the C-shape tool won’t fit.
Then remove the larger areas. Switch to your C-shape wood carving tool to remove the skin across the bigger sections. Work in strokes away from your body, taking off small amounts at a time. Use the V-shape boundary lines and saw hole edges as your guide. Be careful not to cross them.
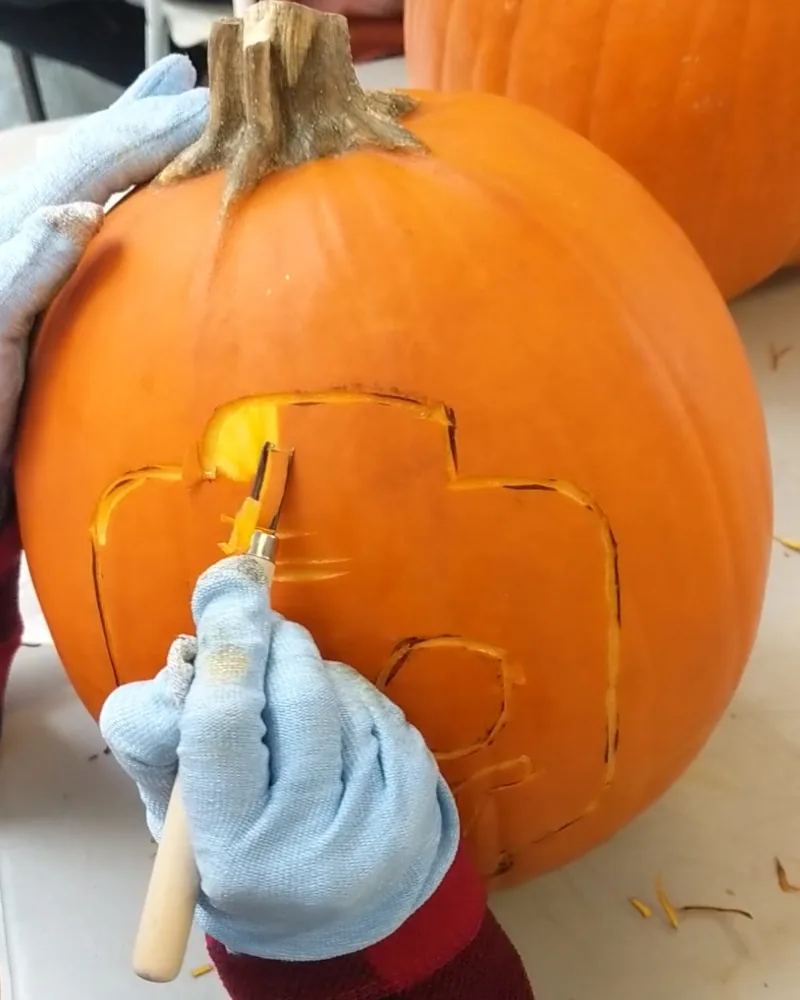
Work your way through every scraped area on your stencil, checking against your printed stencil regularly to make sure you haven’t missed any sections.
Smoothing the surface. If your carving style doesn’t include sculpting (Styles 3, 3+ & 4), your scraped areas should be as smooth and even as possible. Once the skin is removed, use your ribbon clay tools to smooth out any rough marks left by the wood carving tools. A clean, even surface will glow more evenly when lit.
Using a Speedball lino cutter? The same technique applies, just match the bit shape to the tool above. Use the narrower bits for the boundary work and tight spaces, and the wider bits for removing larger sections of skin.
Free download
Get The Ultimate Book on Pumpkin Carving — free
64 chapters covering every technique, every tool, and all nine carving styles. Written by someone who has carved pumpkin portraits for over 30 years and taught 500+ kids. Illustrated with real carvings by the author and his students.
Get the free book →Free to download. Works on iPhone, iPad, Android, and computer.