
Your carving tools are covered here. This topic covers everything else you’ll want nearby before you start.
You’ll need these for almost every carving:
- Printer: for printing your stencil
- Scissors: for trimming the stencil before attaching it
- Masking tape: for attaching the stencil to the pumpkin
- Black Sharpie (fine tip): for tracing and marking; for Styles 3 or 3+, grab two or three, large black areas drain them fast
- Hand sanitizer + cotton pad or tissue: Sharpie eraser. Dab on, wipe off.
- Garden gloves: keep these on while using the carving tools.
- Paper towels: for drying the pumpkin and your hands
For the Sharpie Trace transfer method:
- Tissue paper or white tracing paper: for tracing the stencil
- Thin-tip regular markers: non-Sharpie, ideally blue, red, and black for color-coding your traced lines
- Blue Sharpie (fine tip): useful if your stencil has more than one type of line (Styles 3, 3+, 4, 4+)
- Light box: optional but nice to have; a backlit tracing surface that makes tracing lines much easier
For the Pushpin transfer method:
- Pushpin: one is all you need
- Flour: rub a small amount over the dry pumpkin to make the tiny dot lines visible before carving
For gutting:
- For grown-ups: Large serrated kitchen knife: only for cutting the pumpkin lid (and chimney hole if using candles)
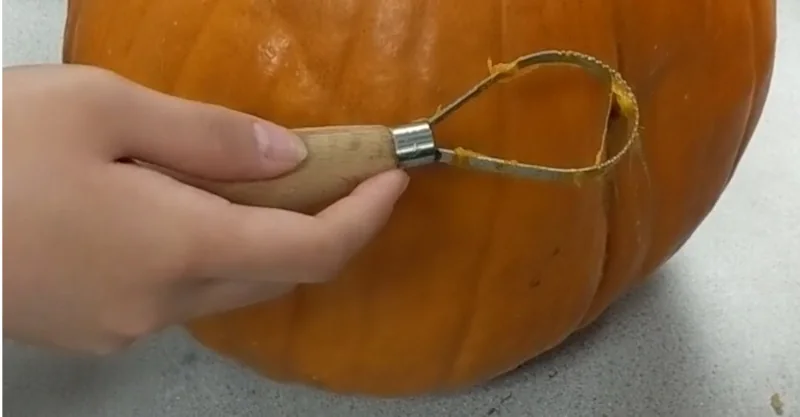
- Ceramic loop tool: the best tool for thinning pumpkin walls and cleaning out guts. The serrated/toothed version works even better. Pear shape works best
- Large spoon or plastic pumpkin scraper: alternative to the loop tool above.
- Garbage bag: for the guts
- Bowl: optional, for collecting seeds if you want to roast them later
- Drop cloth or old newspaper: if you’re not carving over the sink, protect the table
For lighting:
- Battery powered LED puck light + batteries: for lighting your pumpkin
Good to have:
- Replacement keyhole saw blades: blades dull and occasionally snap; good to have a spare pack on hand
- Rubbing alcohol: can recharge a dried-out Sharpie in a pinch
- Vaseline: for sealing cut edges after carving to slow drying; use sparingly as it leaves a shine
- Bleach + spray bottle: for preserving your pumpkin before and after carving
- Toothpicks, paper clips + super glue: for fixing small breaks
For a full shopping list with links to everything here, visit gutsandseeds.com/tools
Free download
Get The Ultimate Book on Pumpkin Carving — free
64 chapters covering every technique, every tool, and all nine carving styles. Written by someone who has carved pumpkin portraits for over 30 years and taught 500+ kids. Illustrated with real carvings by the author and his students.
Get the free book →Free to download. Works on iPhone, iPad, Android, and computer.