
Before you attach anything, double-check that your pumpkin is completely dry. Any moisture on the skin will stop your Sharpie from working and cause tape to peel away mid-transfer.
What you’re attaching depends on which transfer method you’re using:
- Sharpie Trace: attach your traced tissue paper only. Your original printed stencil stays on the table as your reference.
- Pushpin: attach your printed stencil directly.
- Saral Transfer Paper: attach the Saral paper first (blue side against the pumpkin skin), then place your printed stencil on top.
Trim your paper. Use scissors to cut around your stencil leaving about an inch (2.5 cm) of white border. This makes it easier to position on the pumpkin and tape down flat.
Find the best face of your pumpkin. Look for the flattest, best looking side to face forward. Hold your stencil up against it and position it slightly higher than center. Pumpkins are typically displayed way below eye level. If the design extends to the bottom of your pumpkin it will be harder to see.
Taping and Folding
Tape the top first. Press a small piece of masking tape along the top edge to anchor the stencil in place. Then use one hand to hold that top tape against the pumpkin while your other hand smooths the stencil downward, pressing it as flat as possible against the curve. Tape the bottom edge.
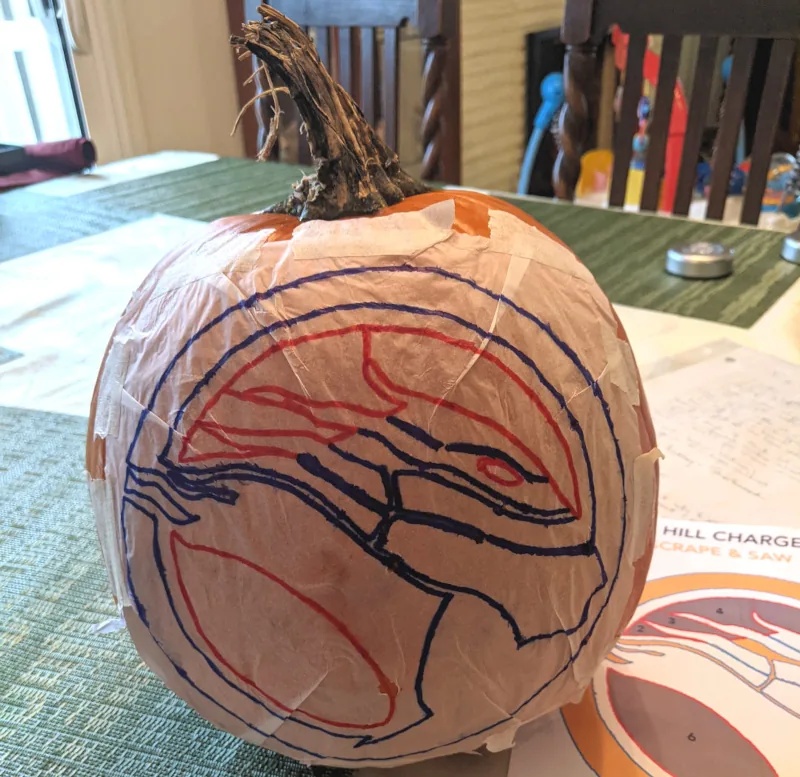
Next, work outward from the most important part of your design. For portraits and animals this is almost always the eyes. Place a fingertip on the eyes and sweep outward to the left, pressing the stencil flat as you go, then tape the left side. Repeat sweeping to the right and tape that side too. These side tapes will probably land above or below the stencil’s center point. That’s expected.
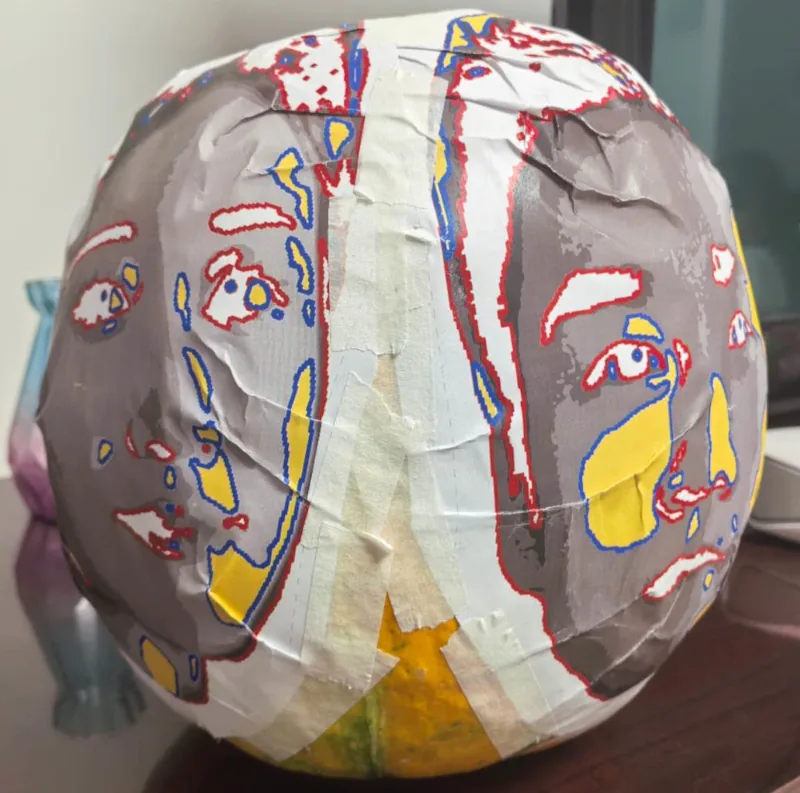
Now the tricky part: the corners. Because your pumpkin is round and your stencil is flat, you’ll need to make three to five small folds at each corner to get the paper to sit flat against the pumpkin. Pinch and experiment with small creases, folding the excess up or down to find the fold that affects your stencil lines the least. Secure each fold with its own small piece of tape.
When you make the corner creases, lines will become disconnected. This is normal and expected. The goal is to have your stencil lying as flat as possible while not disrupting the most important stencil lines. It’s okay if the folds affect the lines for hair, fur, a jawline, or background areas. You’ll reconnect those lines during the transfer step. What you really want to avoid is a fold distorting the lines for the eyes, nose, or mouth.
Free download
Get The Ultimate Book on Pumpkin Carving — free
64 chapters covering every technique, every tool, and all nine carving styles. Written by someone who has carved pumpkin portraits for over 30 years and taught 500+ kids. Illustrated with real carvings by the author and his students.
Get the free book →Free to download. Works on iPhone, iPad, Android, and computer.