
The Pushpin method creates invisible transfer lines. Once your carving is finished there’s no trace of how you did it. No Sharpie marks, no visible dots. People will genuinely wonder how you did it. It’s the method I used for over 30 years before discovering the Sharpie Trace method, and it preserves more detail than any other transfer method.
The trade-offs: it takes about an hour and gets sore on your hand. Take a break and shake your hand out every 5 minutes, it helps. For stencils with Sharpie lines (Styles 3 & 3+), the Sharpie Trace method actually makes more sense since you’ll be using a Sharpie anyway. Also for Style 3+ with three line types to track, the color-coded tissue paper approach is much easier to follow. Save the Pushpin method for Styles 2+, 4 and 4+ where invisible lines really make a difference.
Before starting, go to Attaching Your Stencil to attach your printed stencil to the pumpkin, then come back here.
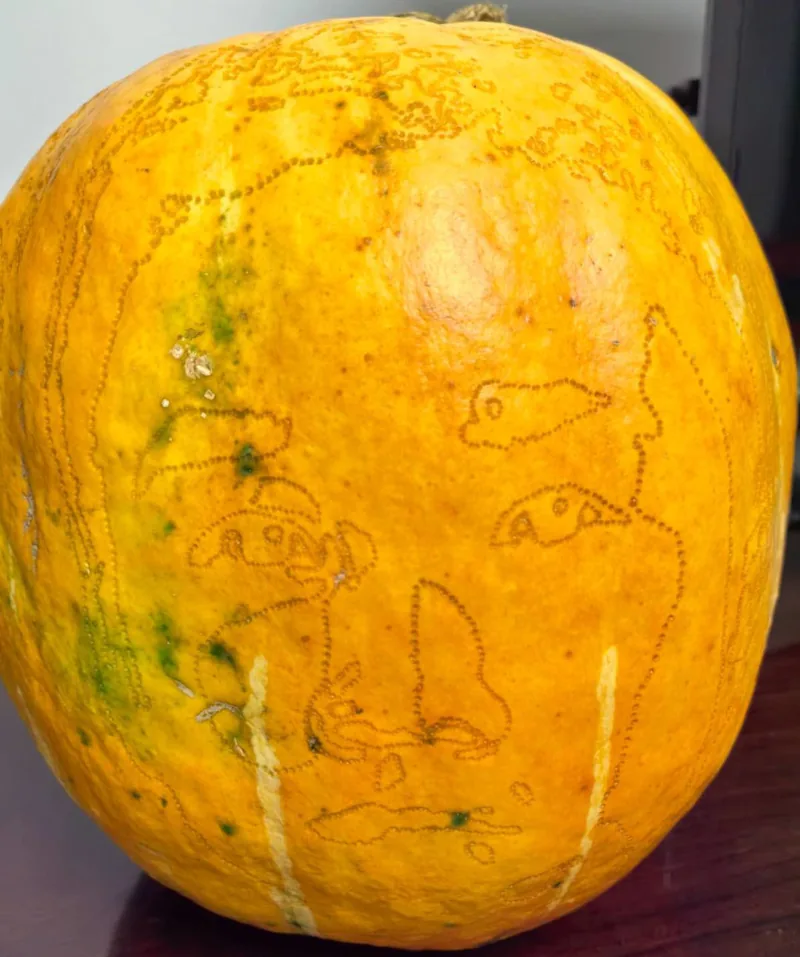
Making the dot lines
Use your pushpin to poke a dotted line along every stencil line. You only need to go about 1/16” (1mm) deep. Test on the back of your pumpkin first to feel how little pressure is needed.
You don’t need perfectly even spacing throughout. Less detailed areas like a jawline or background can have dots spaced about ¼” (5mm) apart. For detailed areas like eyes, push the dots as close together as possible, about 1/16” (1mm) apart. The details that matter should get more time and attention.
Work through one complete set of lines at a time before moving to the next. For example, finish all the Saw lines before starting the scrape lines. This makes it easier to track what you’ve done.
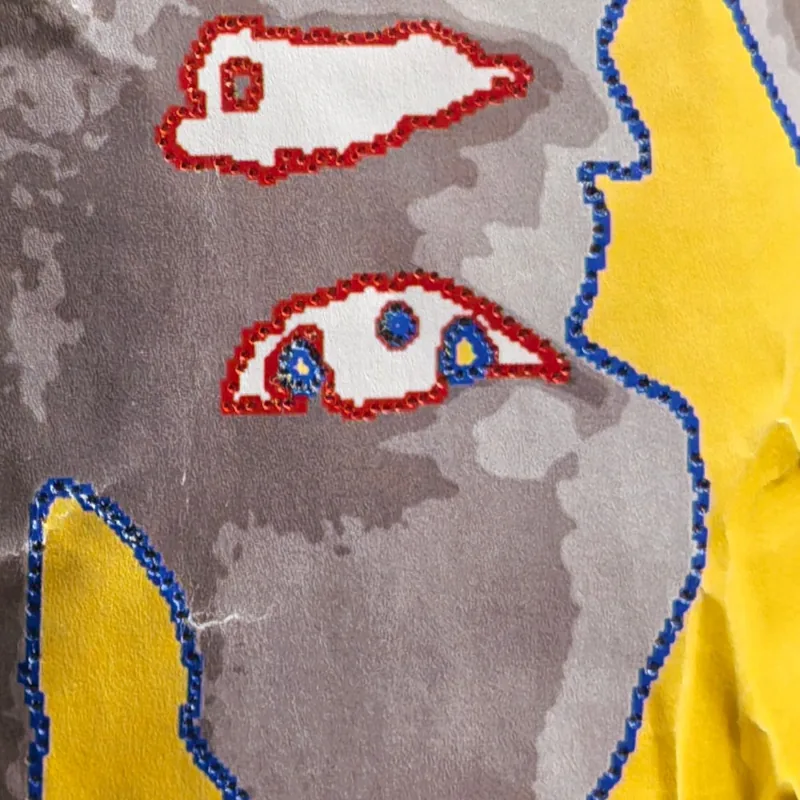
Finding your dot lines
When you’re ready to start carving, rub a small amount of flour over the dry pumpkin surface. The flour settles into the tiny holes making your dot lines easy to find. For stencils with two or more line types, refer to your original printed stencil regularly to confirm which line is which.
Free download
Get The Ultimate Book on Pumpkin Carving — free
64 chapters covering every technique, every tool, and all nine carving styles. Written by someone who has carved pumpkin portraits for over 30 years and taught 500+ kids. Illustrated with real carvings by the author and his students.
Get the free book →Free to download. Works on iPhone, iPad, Android, and computer.